Task 1
|
|
|


Task 3
Task 4


Telescopes and Microscopes Lab
First Procedure
-For the first part, the data we procured was 1) f=25, o=20, i=111, 2) f=25, o=30, i=169, and 3) f=25, o=30, i=93.8.
-For the second part, the data we collected was 1) f=10, o=20, i=43, 2) f=10, o=15, i=59.25, 3) f=10, o=30, i=47.25.
-For the third part, the data we collected was 1) f1=10, f2=45, ft=30 2) Lens 1=20, Lens 2=31, Image=76.5.
-For the fourth part, the data we collected was 1) ft=12.98, 2) f2=-43.529.
Second Procedure
-Our group had to build a telescope out of the lenses and measure the distance between two lines. (see picture below)
-The calculations we procured for 5) the distance between object and objective lens is 25/18.3=6.7 cm, (1/20-⅙.7)^-1=di=-10.07cm, 10.07+25=35.07.
-The calculations we procured for 6) Normal: 6.5 cm, w/ microscope: 6.5/4.5=1.444.
-The calculations we procured for 7) Near Point=2.9 cm, L:38, Fo:25, Fe:20, N:2.9, M+(38-25-20)(2.9/(25x20)=-4.06.


Task 5
In Task 5, we built a very basic microscope! The process is in the document below :
In the gallery below, you can see the result in person:


Task 6


Task 7
|
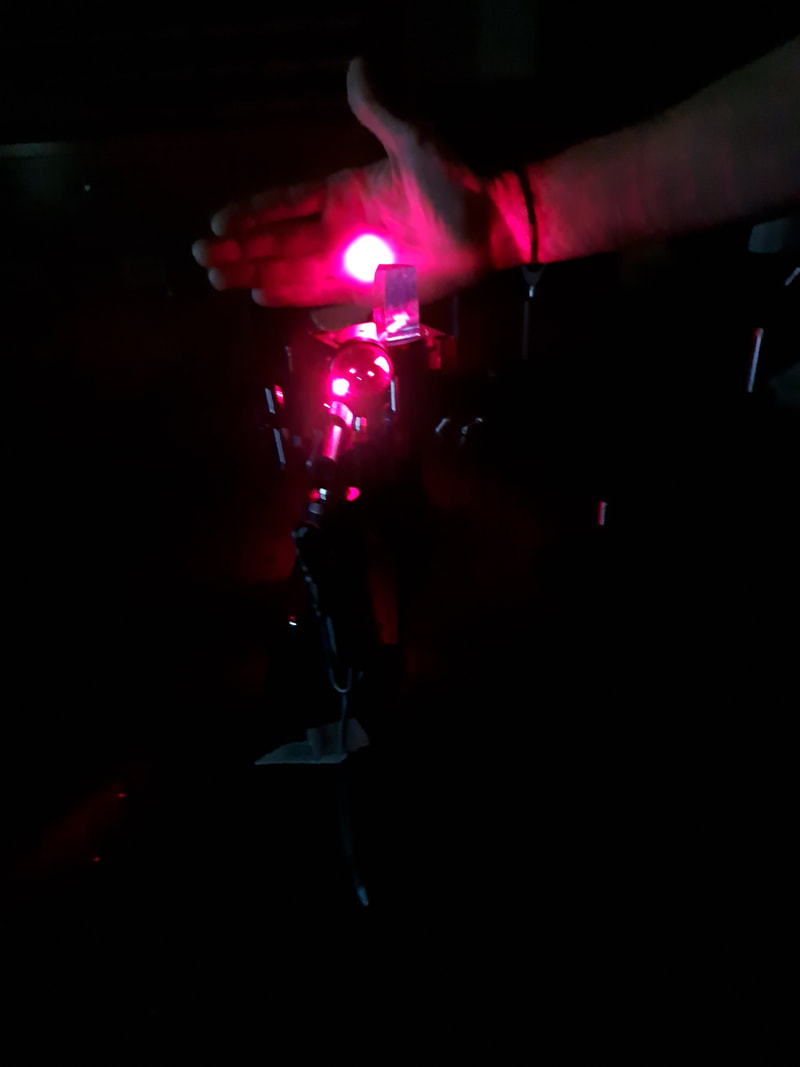
Poisson's point is a bright point that appears at the center of a circular object's shadow due to Fresnel diffraction.
|
|


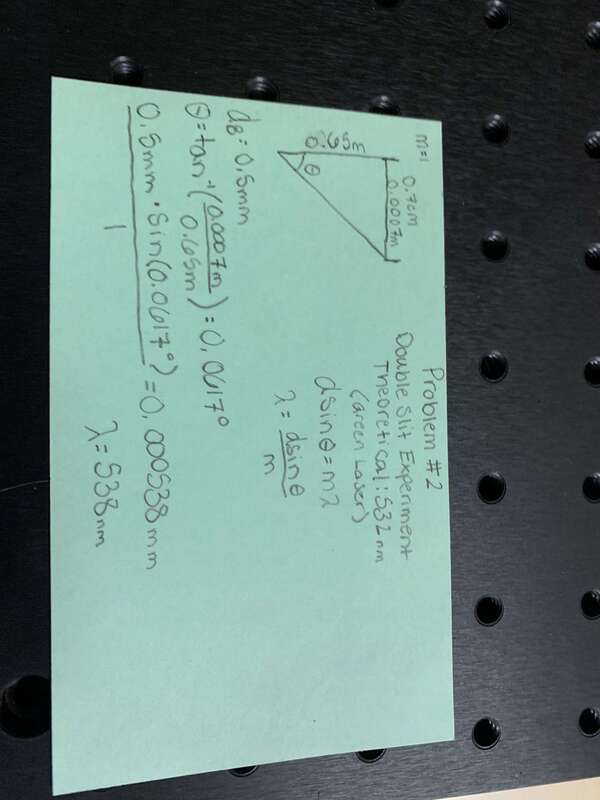
The math done to find the theoretical value of the wavelength of the laser is shown below. The actual wavelength measured was 532 nm.
Then we built a Michelson Interferometer and showed the fringe lines the laser produced.


Task 10 (Final)
-Above is the presentation Aden, Tim, and I worked on for our microscope.
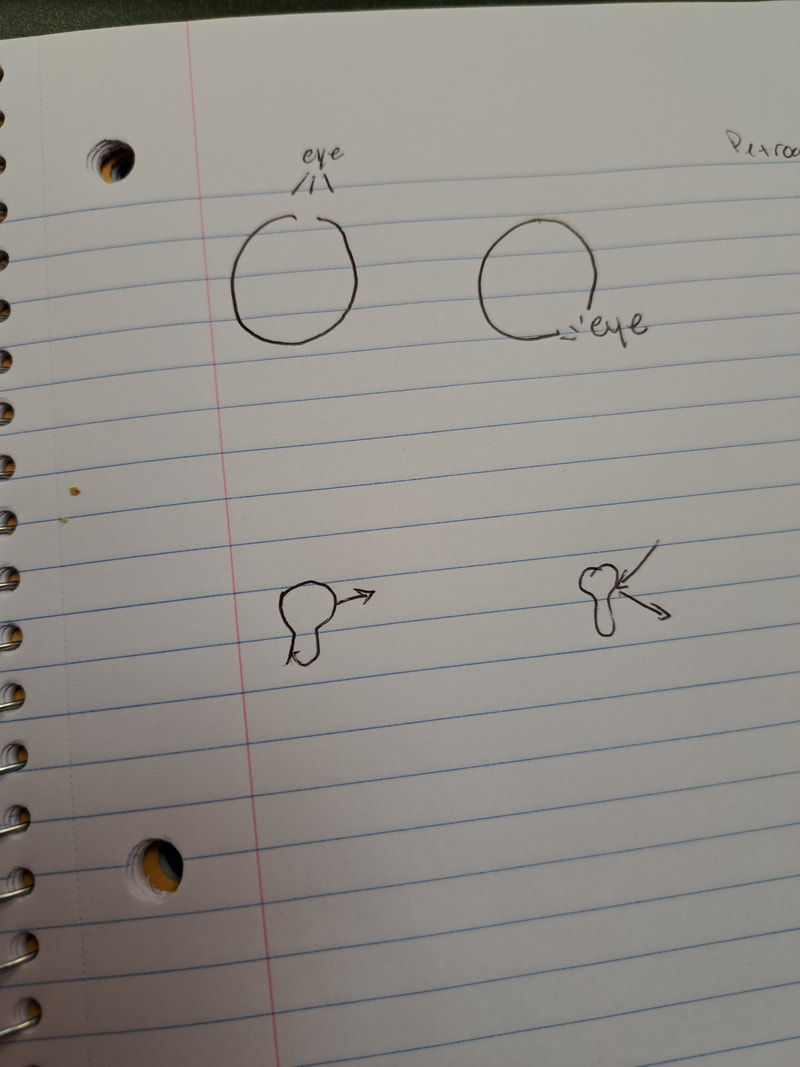
-A Petrographic microscope is a microscope that uses two polarizers at two different angles to see the different layers in a thin rock section. It is commonly used in Geology fields, such as petrology and mineralogy, but is less commonly used in Biology and medicinal fields. Petrographic microscopes are used in Geology for analyizing the mineral composition of the sample, dating the rock in a more accurate way, getting a better in-depth understanding of the texture and grain size of the rock, as well as seeing inclusions and formation processes more clearly. It works by unpolarized light passing through the condenser (a convex lens) to concentrate the light rays to illuminate the thin section, the light then passes through the first, lower polarizer to create plane-polarized light (PPL), which is when all waves follow the same direction of vibration. The light will then travel through the diaphragm aperture to control the amount of light allowed to pass throughout the microscope, creating a light beam. The light will then travel through the objective, which is a second convex lens used to magnify the image. The light will then pass through the second, upper polarizer in order to create cross-polarized light (XPL), which is when two PPL's come together to create an image which allows a specific amount of light to shine through, creating the different layers we see when you move a polarizer. The final piece of the microscope is the eye piece, which is a third convex lens that magnifies and creates a real image.
-The first calculations we had to do was where to put the stage so the microscope will be in focus, do1 = 8.9 cm = 89 mm. It needed to be outside the focal length so we could create an image. The next equation is di1 = (1/f - 1/do1)^-1, therefore (1/50 - 1/89)^-1, which equals 1140.10 mm. do2 = 166 - 114, which equals 52 mm. The second equation we used was di2 = (1/f - do2)^-1, therefore (1/50 - 1/52)^-1, which equals 1300 mm. This means that the second lens had to be 1300 mm from the stage. The second calculations we had to do was to find the magnification for our microscope. The first equation we had to use was m1 = -di/do, therefore -144/89, which equals -1.3. m2 = -di/do, therefore -1300/52, which equals -25. The third and final equation was mtot = m1m2, therefore (-1.3)(-25), which equals 32.5, meaning the image is 32.5x the size of the thin section.
-The troubles we faced while constructing this microscope was having incorrectly labeled lens (that was my fault, I apologize), causing us to have to remeasure the magnification of the lens. Another huge problem was that, while we had a rotating stage for the thin section, there was no way to mount it, so we just individually moved the polarizers, which worked out well. The last problem, besides having to realign every time we put the light source back in because we had to share with another group, was having to order new polarizers because the ones we had already couldn't mount properly.
-What I contributed to the microscope was aligning the microscope, researching the topic and collecting information for the slides. Helping Aden create the line up for each part, defining parts, helping to create slides, and helping to present with my group.
Optics Reflection
-Overall, my experience in my Optics college course was very interesting for me. I personally hadn't taken a physics course since my senior year of high school, and I was taking calculus for the first time and general physics one during my level 3 optics course. I was in a class where everyone had way more physics experience than I do, and I knew no one at all. My home life was a complete wreck and trying to understand the material was especially difficult for my very small brain. Despite the issues, Professor Johnson is a very patient, wonderful teacher, who excels at being one of the most patient people I've ever met. He was able to explain slightly advanced concepts to me in a way I could completely understand. He made, what could have been a very hard, frustrating class, understandable and incredibly enjoyable. I can confidently say I learned so much during this semester course, and I recommend it to anyone interested. I am impressed with the content I learned and the professor who taught it. I understand colors and light in a completely new and awe inspiring way I never have. I have a new found appreciation for the way my eyes work.
Thank you.
Thank you.
